 The iodometric determination of copper in brass is both a delight and a challenge to carry out
both because of the disproportionation of iodate and iodide in acid solution to produce iodine,
which must be titrated quickly owing to the volatile nature of elemental iodine, because of the
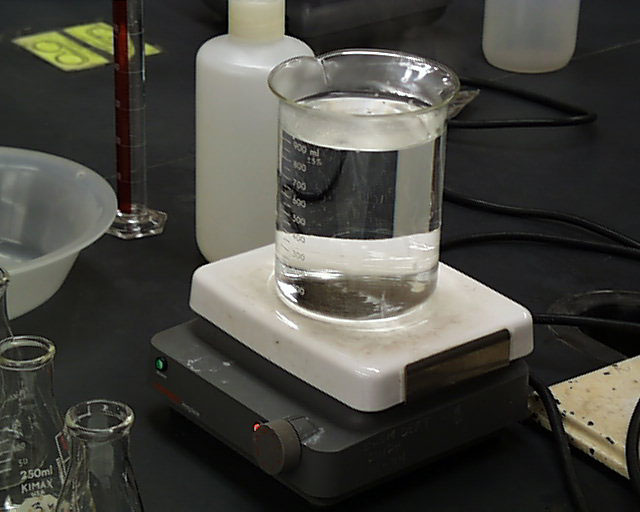
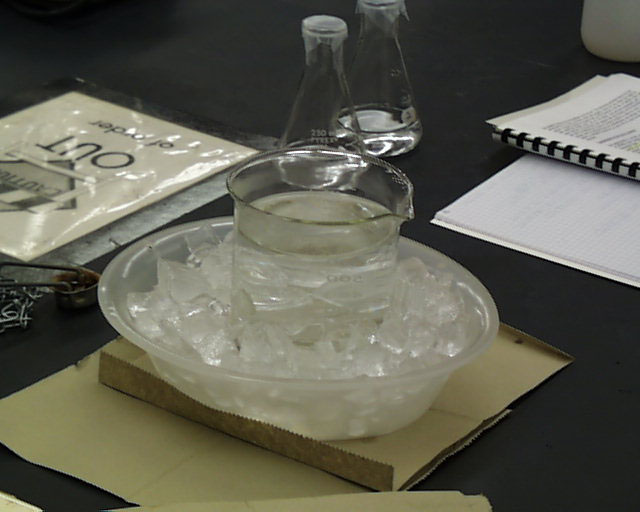
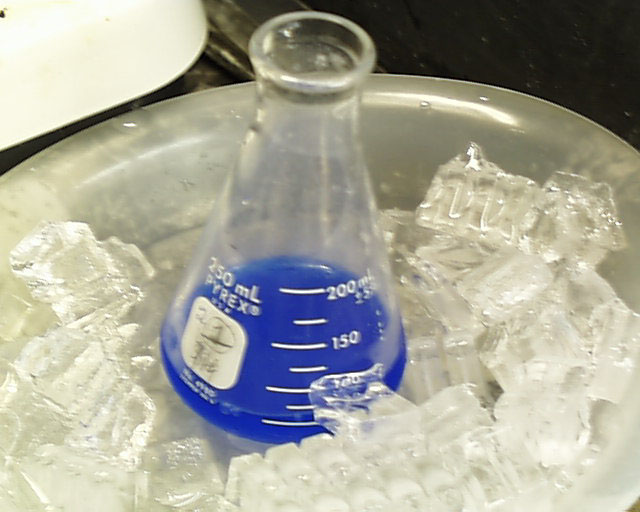
care which must be taken in the preparation of the thiosulfate solution so that it doesn't get eaten
up by bacteria (see it being heated in a one-liter beaker at the left and subsequently cooled in ice
at the right) before it is used and because of the subtlety of the color changes one observes.
The iodometric determination of copper in brass is both a delight and a challenge to carry out
both because of the disproportionation of iodate and iodide in acid solution to produce iodine,
which must be titrated quickly owing to the volatile nature of elemental iodine, because of the
care which must be taken in the preparation of the thiosulfate solution so that it doesn't get eaten
up by bacteria (see it being heated in a one-liter beaker at the left and subsequently cooled in ice
at the right) before it is used and because of the subtlety of the color changes one observes.
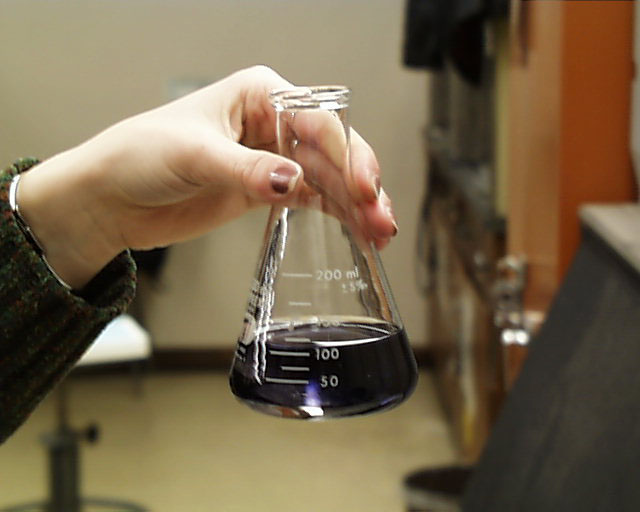
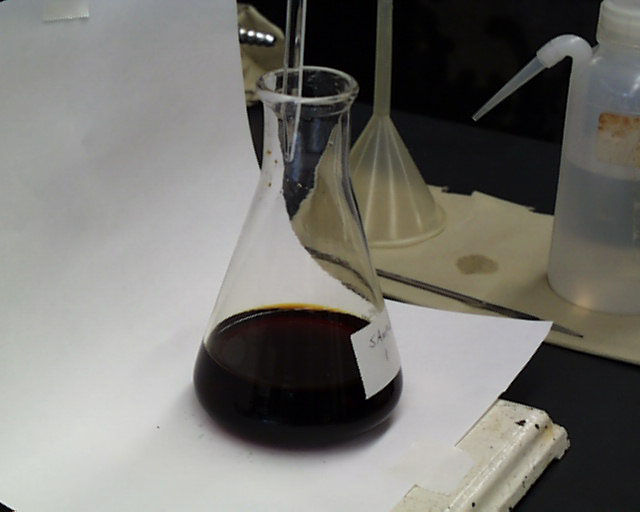 Here we have a solution of precisely weighed potassium iodate with added HCl that has just
been served with an excess of potassium iodide. A disproportionation has occurred in the
oxidation states of the iodine in iodate and iodide to produce elemental iodine complexed with the
excess iodide to produce the triodide ion. A deep red-brown solution results (almost black), as on
the right.
Here we have a solution of precisely weighed potassium iodate with added HCl that has just
been served with an excess of potassium iodide. A disproportionation has occurred in the
oxidation states of the iodine in iodate and iodide to produce elemental iodine complexed with the
excess iodide to produce the triodide ion. A deep red-brown solution results (almost black), as on
the right.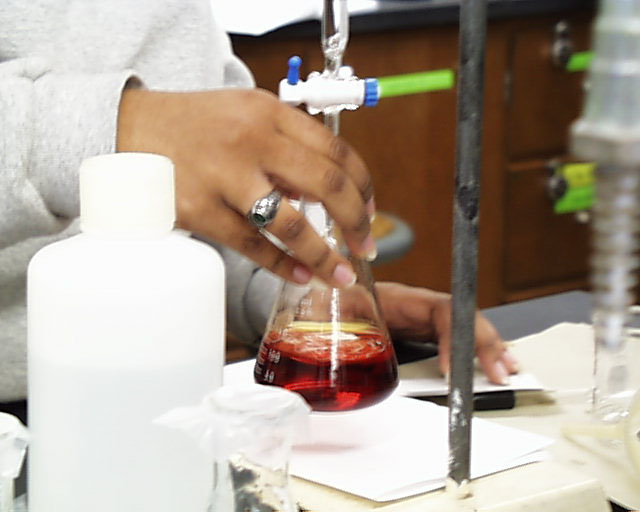
As the precisely weighed (and now reduced) iodate is titrated with thiosulfate solution in the process of standardizing it, the solution first turns a dark red, then orange, then yellow. The titration showed here on the left and right illustrates the colors you can expect to see during the progress of this standardization titration.
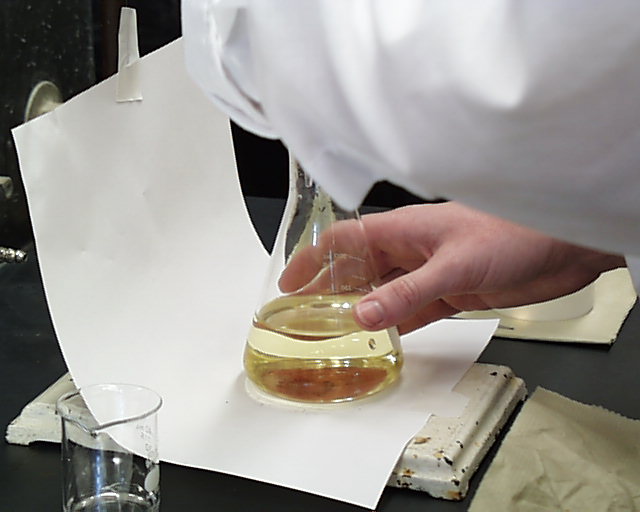

Finally, a light yellow color is achieved. The images on the left and right are about what one would expect before adding the starch indicator. Your solution can be a bit darker than this without significantly affecting your accuracy (excessive binding of starch to iodine, producing a premature end point), but not too much.
Likewise, you must be careful not to go beyond the light yellow stage. The example on the right illustrates the point at which one wouldn't want to go any further without risking the possibility that the end point has been exceeded.
A precalibrated 5 mL aliquot of starch indicator solution may be added at this stage, as on the left. Your solution ought to turn purple immediately as shown. Swirl the solution gently to mix the starch with the remaining iodine in solution to prepare it for immediate titration to the end point, as on the left.
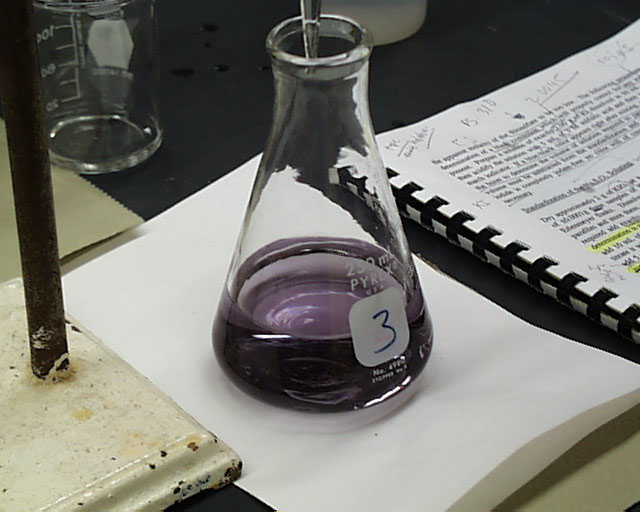
One would expect to be just a few drops from the end point if the procedure has been followed correctly. Gently swirl while adding your thiosulfate solution dropwise until all purple color has disappeared.
Your brass sample is to be dissolved in concentrated nitric acid while heating the solution on a hot plate as shown at the left. Since nitrogen oxides can interfere with the thiosulfate titration, they must be removed by the addition of 10mL of concentrated sulfuric acid, as shown at the right, but the student's hand really ought not to be exposed to the mouth of the other flask. The solutions of dissolved brass generally have a low volume and high acid and salt concentrations. "Bumping" or little explosions of steam in the superheated liquid can occur. You don't want your hand to be close to the mouth of the flask should the solution suddenly "bump" because drops of acid (not to mention part of your sample) will fly out of the flask and possibly onto your hand.
 The image on the left shows the results of just such a spattering five days after it occurred. This
student was holding a flask with the rubber Hot Hand and as the flask was removed, it "bumped",
splattering her hand. The student washed her hand immediately with copious quantities of water
and the instructor helped her to rub a slurry of sodium carbonate all over the spots. She then
went to the student health center for treatment, but the hot concentrated acid had already done its
work. The use of crucible tongs, as shown on the right, is a safer method for moving around
flasks containing these solutions.
The image on the left shows the results of just such a spattering five days after it occurred. This
student was holding a flask with the rubber Hot Hand and as the flask was removed, it "bumped",
splattering her hand. The student washed her hand immediately with copious quantities of water
and the instructor helped her to rub a slurry of sodium carbonate all over the spots. She then
went to the student health center for treatment, but the hot concentrated acid had already done its
work. The use of crucible tongs, as shown on the right, is a safer method for moving around
flasks containing these solutions.
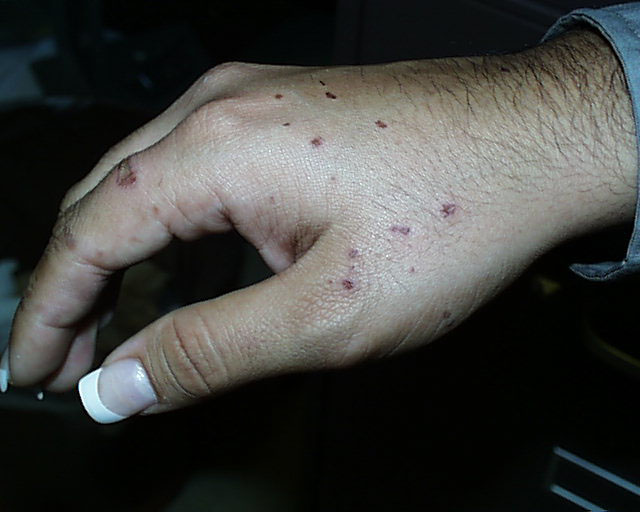
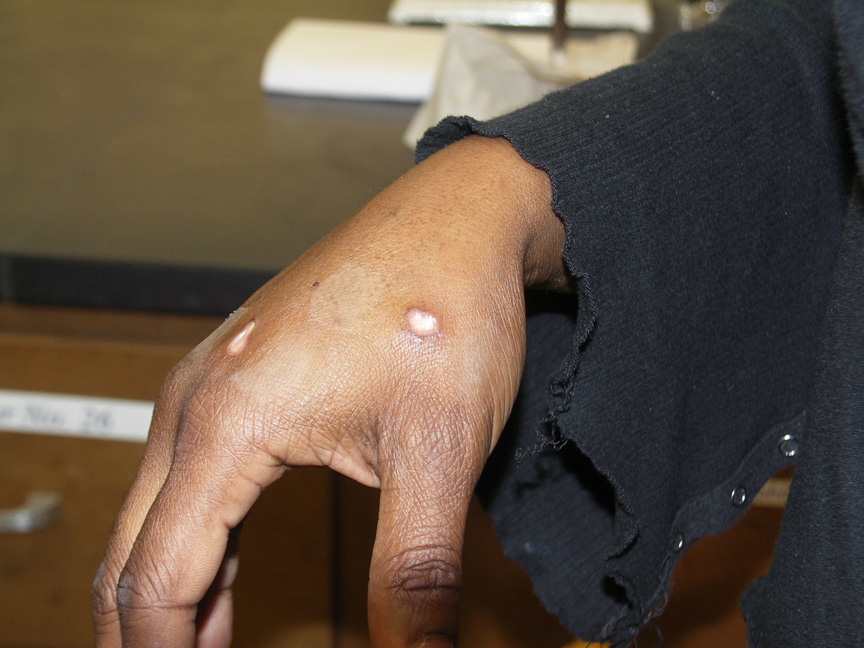
 A similar spattering occurred recently in which five seconds passed between the time the droplets
of hot nitric and sulfuric acid spattered onto the student's arm and hand and when she began
rinsing off the acid in copious quantities of running water. The top pair of photos show where the
droplets hit minutes after it happened. She thereafter visited the Student Health Center for
medical treatment.
A similar spattering occurred recently in which five seconds passed between the time the droplets
of hot nitric and sulfuric acid spattered onto the student's arm and hand and when she began
rinsing off the acid in copious quantities of running water. The top pair of photos show where the
droplets hit minutes after it happened. She thereafter visited the Student Health Center for
medical treatment.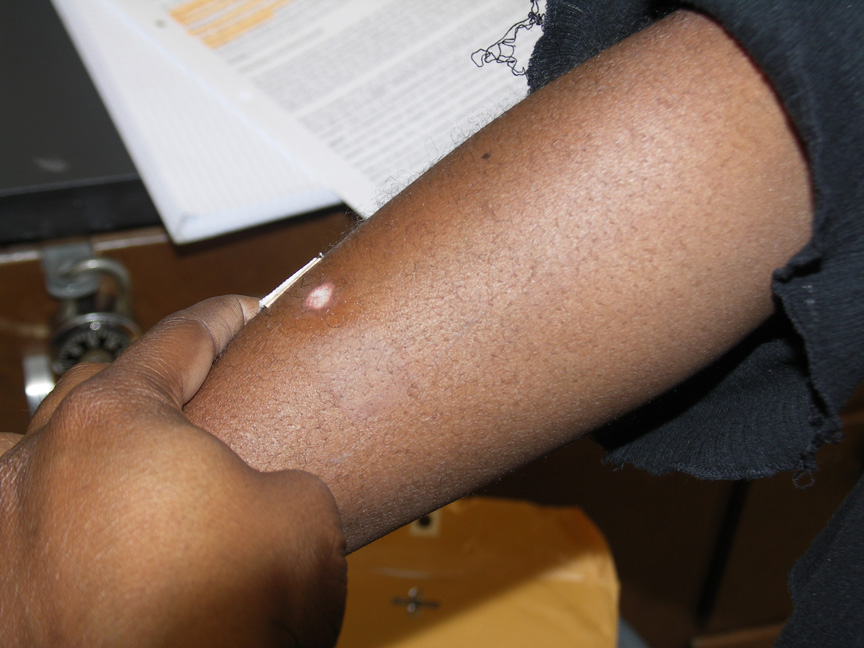
One week later.
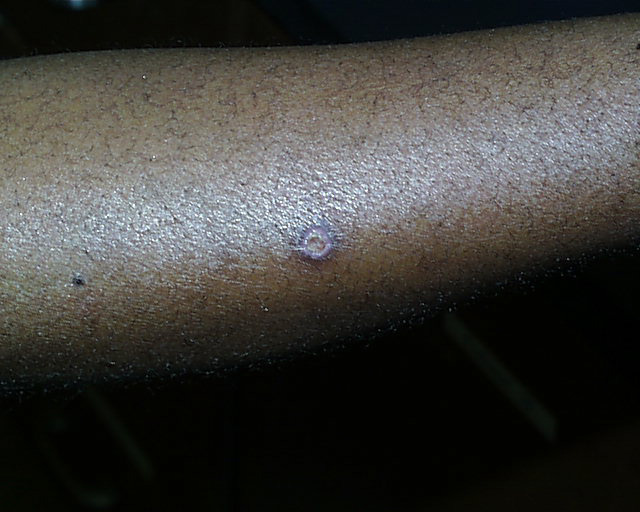
 Two weeks later.
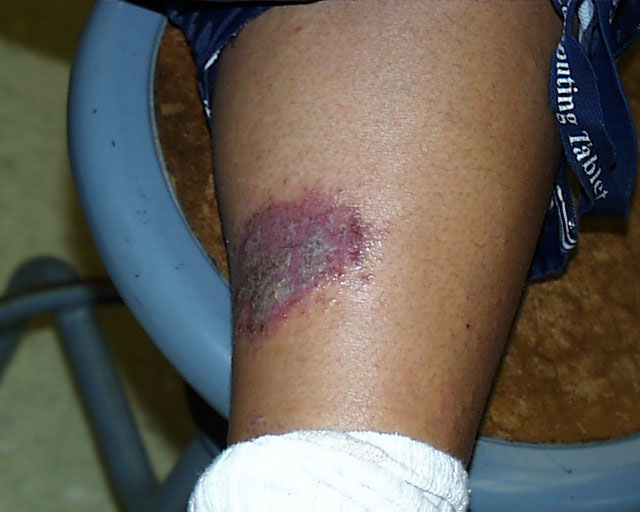 So as not to leave anything to chance, we can't emphasize too strongly that strong acids
are to be treated with respect and care. The image on the right shows the result of a splash and
extended contact of 3M sulfuric acid six months after it occurred. The student was working in a
non-university
laboratory. His supervisor spilled and splashed some 3M sulfuric acid but was not aware that any
had gone beyond the immediate work bench area. The student was standing a few feet away. An
hour after the splash occurred the student felt a burning sensation near his ankle. He was wearing
elastic sweat pants with direct contact with his skin in that area. When he tried to pull up his pant
leg to find out what was causing the burning sensation he noticed that the fabric had bonded
(more or less) to his skin at the place producing the burning sensation. He realized what had
happened and soon thereafter cut away the bottom of his pant leg and sought medical treatment.
The remaining scar is a good indication of the long-lasting appearance of such an injury.
So as not to leave anything to chance, we can't emphasize too strongly that strong acids
are to be treated with respect and care. The image on the right shows the result of a splash and
extended contact of 3M sulfuric acid six months after it occurred. The student was working in a
non-university
laboratory. His supervisor spilled and splashed some 3M sulfuric acid but was not aware that any
had gone beyond the immediate work bench area. The student was standing a few feet away. An
hour after the splash occurred the student felt a burning sensation near his ankle. He was wearing
elastic sweat pants with direct contact with his skin in that area. When he tried to pull up his pant
leg to find out what was causing the burning sensation he noticed that the fabric had bonded
(more or less) to his skin at the place producing the burning sensation. He realized what had
happened and soon thereafter cut away the bottom of his pant leg and sought medical treatment.
The remaining scar is a good indication of the long-lasting appearance of such an injury.
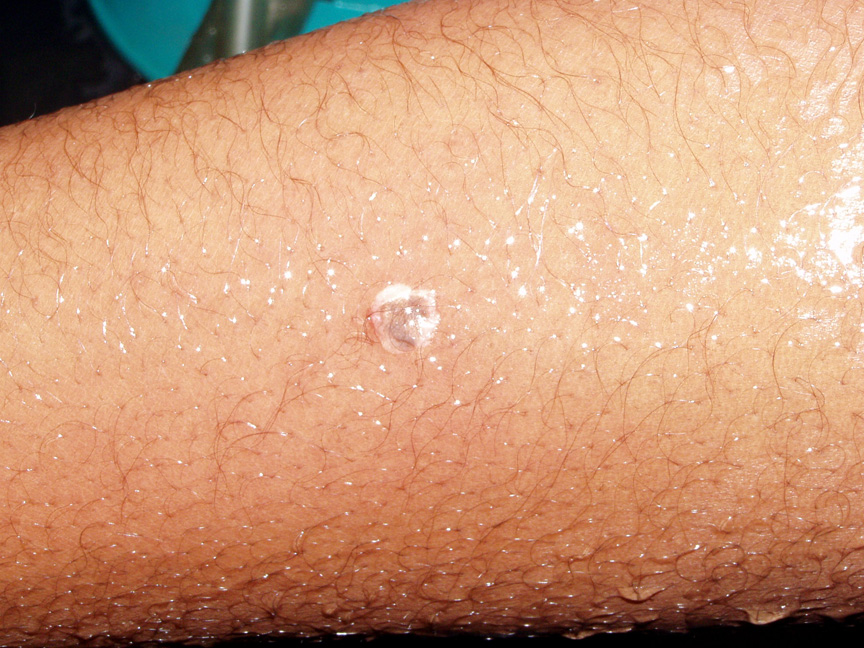
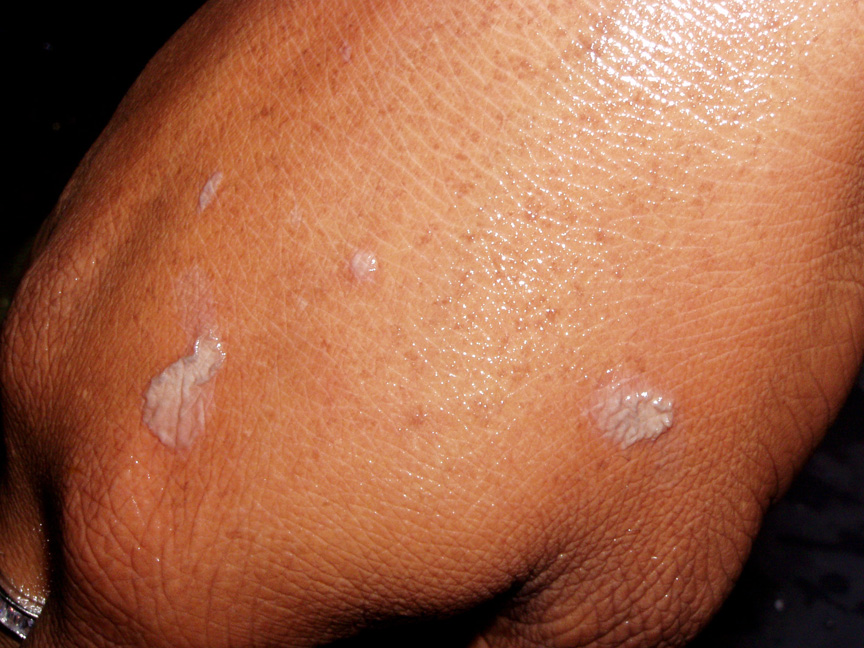
Any acid which contacts the skin must be washed off immediately. Acid which dribbles down the outside of laboratory stock bottles offers a familiar peril to students who use bottles of reagents in common.
 One is not immediately conscious of such contact because even in the case of concentrated acids
there is some delay before the reaction between acid and skin raises the temperature sufficiently
for one to feel the effect. Students are advised to be conscious at all times of potential mishaps
caused by their procedures and to be prepared to take immediate and appropriate action. If
fingers or other areas having exposed skin feel wet when they ought not to be wet, the surface
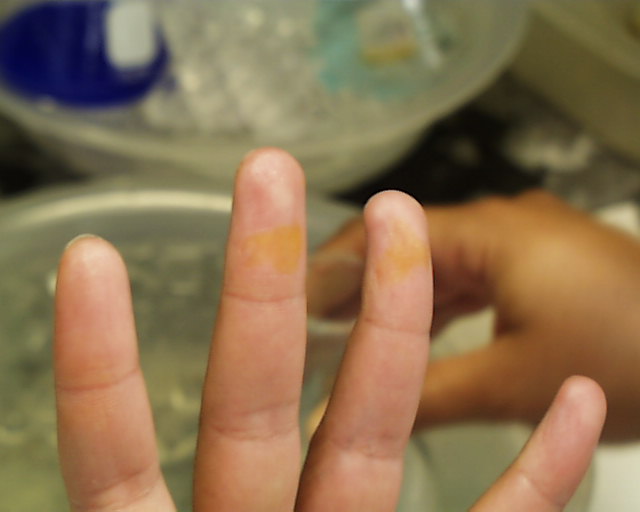
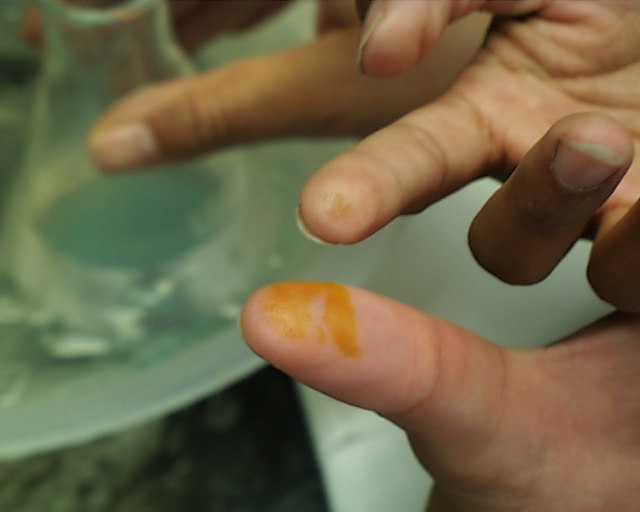
should be washed immediately in running water. The images at the left and right show the effect
of either concentrated sulfuric or nitric acids which stayed on the skin for more than a few
seconds (but less than a minute) before being washed off. Fortunately most discolorations caused
by such contact disappear within a few days, but constant vigilance in the laboratory is the rule
which should be followed at all times.
One is not immediately conscious of such contact because even in the case of concentrated acids
there is some delay before the reaction between acid and skin raises the temperature sufficiently
for one to feel the effect. Students are advised to be conscious at all times of potential mishaps
caused by their procedures and to be prepared to take immediate and appropriate action. If
fingers or other areas having exposed skin feel wet when they ought not to be wet, the surface
should be washed immediately in running water. The images at the left and right show the effect
of either concentrated sulfuric or nitric acids which stayed on the skin for more than a few
seconds (but less than a minute) before being washed off. Fortunately most discolorations caused
by such contact disappear within a few days, but constant vigilance in the laboratory is the rule
which should be followed at all times.
Continuing with the presentation of helpful hints, the presence of the concentrated sulfuric acid aids in the exclusion of the remaining nitrogen oxides from the hot solution. Those red oxides first boil off, then one sees fumes of sulfur trioxide beginning to escape, as at the left
.
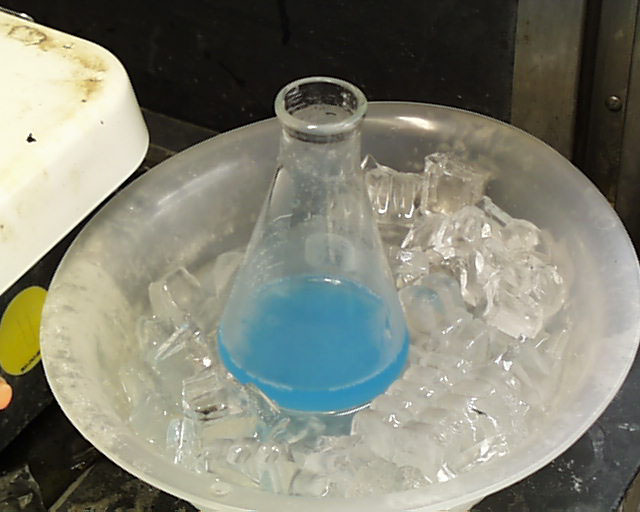
The resulting sample is first cooled in ice, as on the left.
Then concentrated ammonia is added dropwise until the dark blue copper tetraamine complex is formed, as on the right. 3M sulfuric acid is then added until the dark color ALMOST disappears, then concentrated phosphoric acid is added to bring the pH to a point at which the titration can be ideally performed.
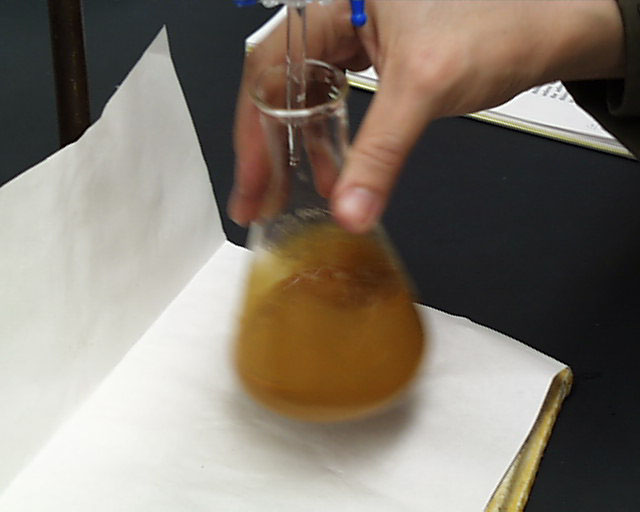
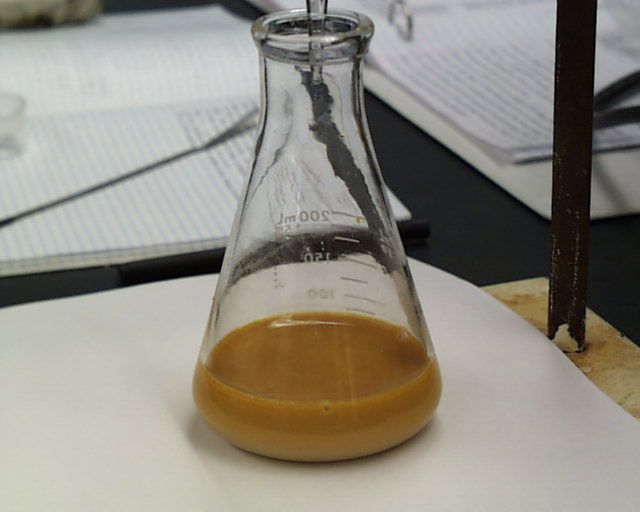
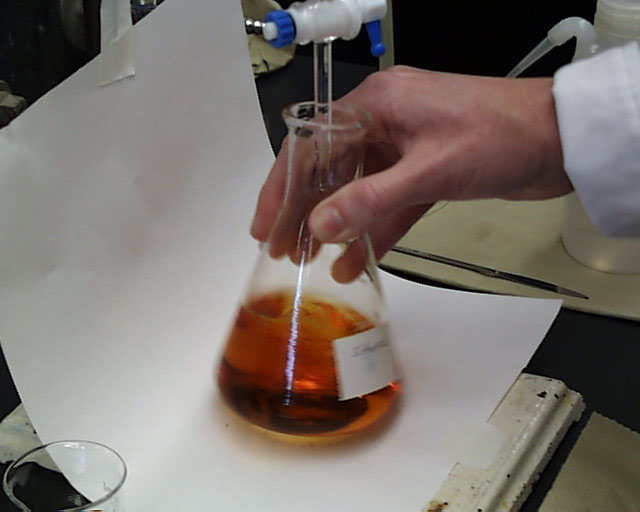
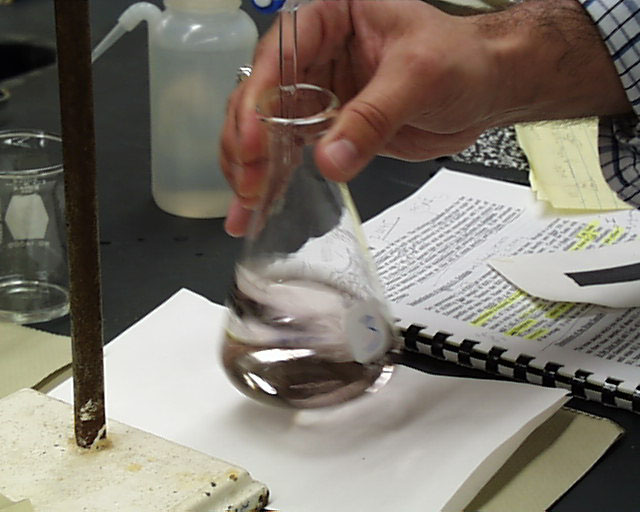
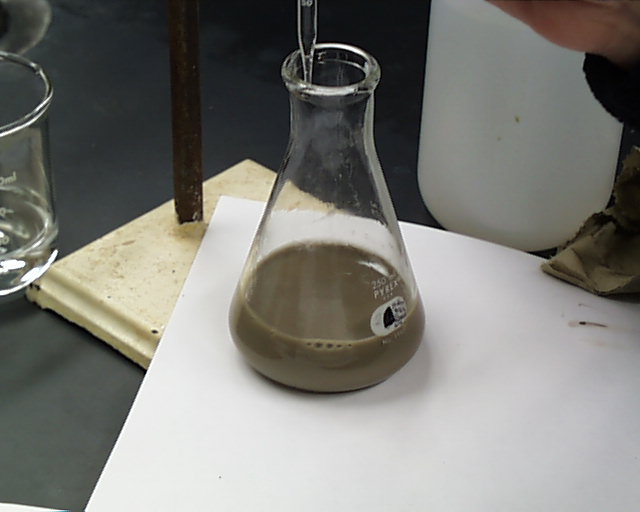
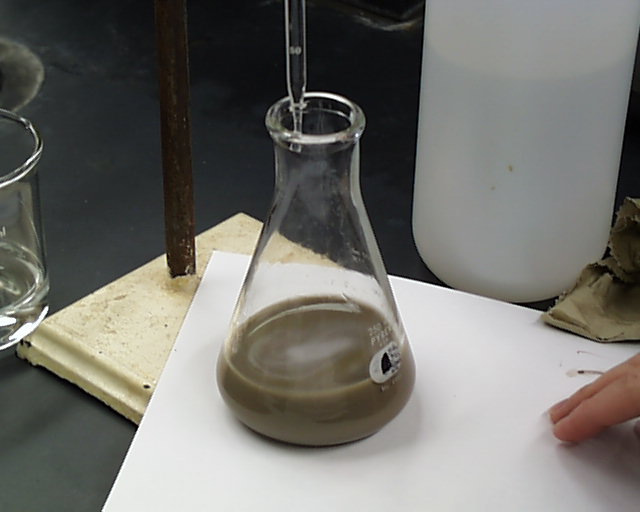
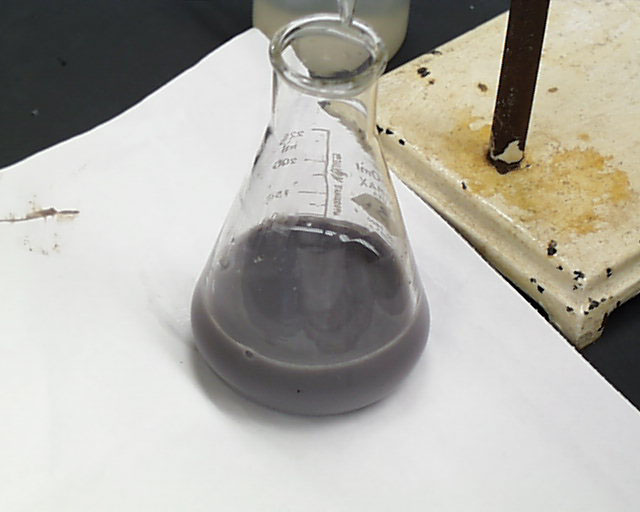
Potassium iodide is added and the solution, when swirled, looks like the image on the left. The actual color you get will vary somewhat and it will depend on the amount of zinc in the brass. High concentrations of zinc give darker colors. The solution is titrated and it slowly loses its dark color. Notice the slightly lighter color at the right. Finally, it will become a light yellow-brown or mustard color, as shown below and left.
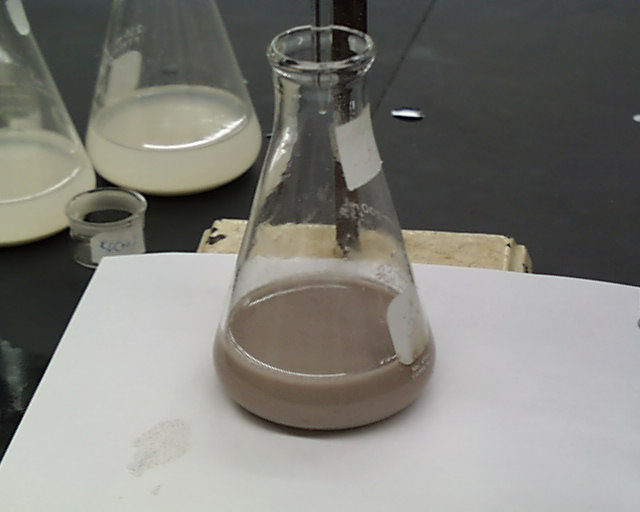
At this point, starch is added using the calibrated pipette at the left and the suspension swirled so that the dark iodine/beta-amylose complex assumes homogeneity throughout the solution, as on the right.
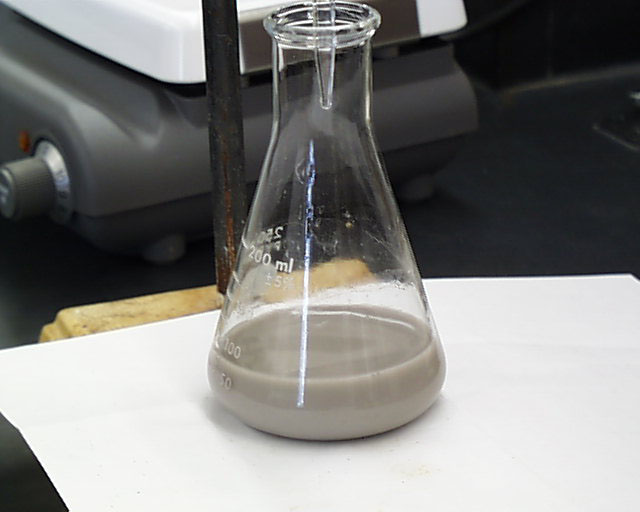
As your titration progresses you will begin to notice that as thiosulfate solution is added dropwise a spot forms in the center of the brass solution which more and more begins to resemble a lavender color. The spot forming on the left certainly doesn't look lavender to me, but to some extent that is the result of the angle and exposure of the photo.
Finally though, the lavender color becomes more pronounced and your whole suspension will more and more appear like that on the left and the right.
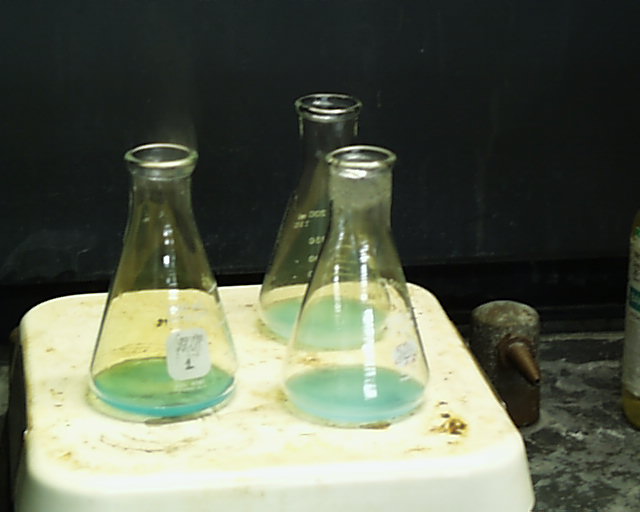
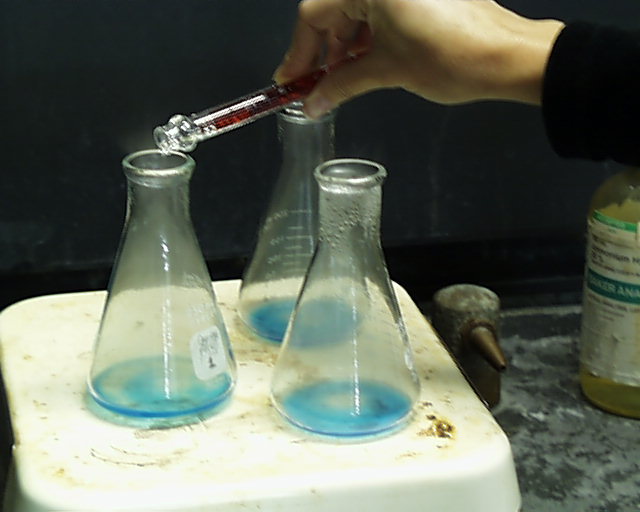
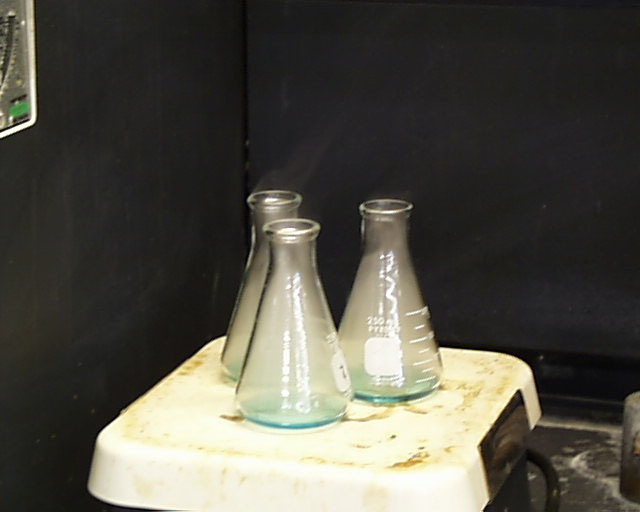
At this point you add the KSCN crystals which, when they dissolve, competitively inhibit the binding of iodine to CuI, freeing it up (and turning your suspension once again a dark grey color, as on the left) for final titration to the cream-colored end point, like the color shown in the Erlenmeyer flasks the suspensions in which have been titrated completely in the upper left corner of the image just above and left.
Click here to return to Oliver's Index of Chemical Demonstrations